+86-750-3598205


Choosing the right Led Extrusion profile is more than selecting an attractive aluminum channel. It affects heat management, light distribution, installation speed, and long-term appearance. A profile placed beneath a kitchen cabinet faces different demands than one installed in a humid bathroom or outdoor sign.
Ian Ashdown, a respected LED lighting engineer, offers a useful reminder: “LEDs are not light bulbs.” Their performance depends on thermal conditions, optics, power, and installation quality. That principle should guide every profile decision.
This guide examines the practical details behind a reliable choice. It considers aluminum thickness, diffuser type, LED strip width, mounting method, and environmental protection. A deeper channel may hide bright LED points more effectively. A frosted diffuser can create softer light, though it may reduce brightness. Small differences matter.
Measure twice.
A common mistake is choosing the profile by appearance alone. I have seen sleek channels fail because the strip was too powerful for the available heat dissipation. Others looked acceptable in a showroom but produced visible hotspots at home. These details are easy to overlook.
The right Led Extrusion profile should fit the application, not merely the catalog photograph. Check the strip dimensions, calculate the heat load, and consider how the diffuser will age. The answer is not always obvious. Sometimes, the most refined solution requires a wider profile, stronger mounting clips, or a less decorative design.
This introduction sets the direction for a more careful evaluation. Reliable lighting begins with realistic conditions, accurate measurements, and a willingness to question the first choice.
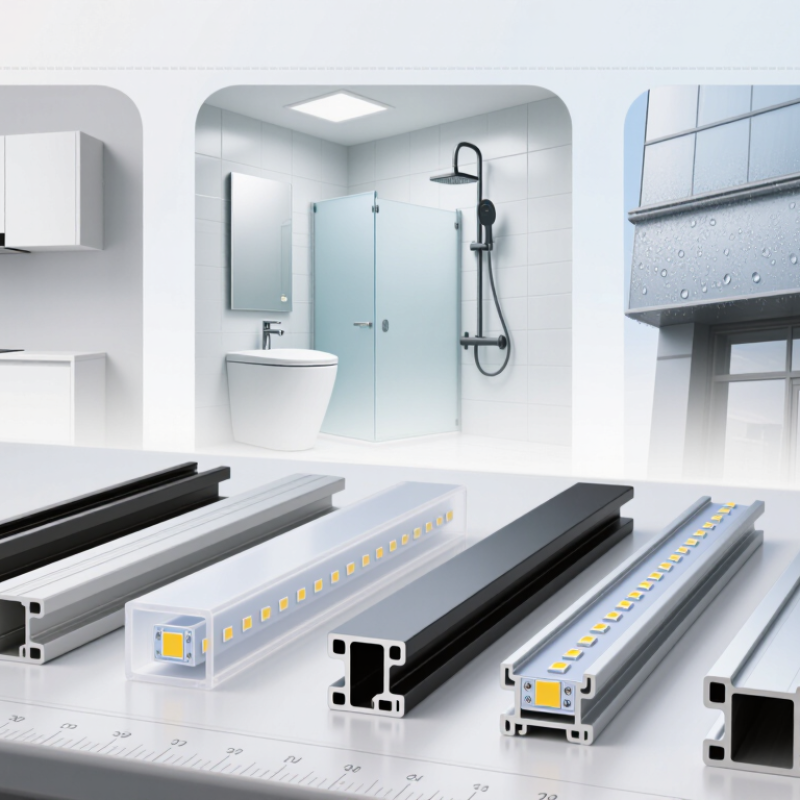
Choosing the right LED extrusion profile starts with a practical question: what must the lighting do? A kitchen task light needs clean diffusion, easy cleaning, and effective heat dissipation. A decorative shelf may need only a narrow channel and a soft glow. For stairs, corridors, or humid areas, safety and protection deserve greater attention. I have seen attractive profiles fail because their purpose was defined too late. The shape looked perfect. The lighting did not.
Measure the mounting surface, available depth, viewing angle, and cable route before selecting the profile. Check whether the channel will sit in wood, plasterboard, aluminum, or exposed concrete. Each material affects fixing strength and heat transfer. Recessed profiles require accurate cutting. Surface-mounted profiles tolerate uneven surfaces better.
In humid locations, confirm the complete assembly has suitable ingress protection, not just the cover. Also allow space for connectors, wiring, and the power supply.
LED output, strip width, and operating hours should guide thermal decisions. Higher-power strips need a metal body that can release heat effectively. Do not judge brightness by appearance alone. Test a short sample at the actual mounting location. It may reveal glare, shadows, or visible dot patterns. I sometimes underestimate installation tolerances, especially on long runs. That mistake is useful, but expensive after cutting. Leave room for adjustment and future replacement. Verify electrical ratings against applicable installation requirements.
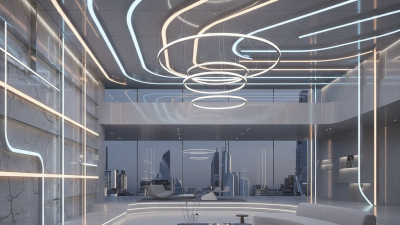
Choosing an LED extrusion profile starts with the installation surface, not the visual shape. A recessed profile suits plaster, cabinetry, and clean architectural lines. A surface-mounted channel works better on concrete, timber, or finished walls. Corner profiles direct light across shelves or vertical edges. I have found that a slim profile can look elegant, yet it may leave too little space for heat control.
Profile depth also affects optical performance. A deeper channel usually creates better diffuser clearance and reduces visible LED dots. The U.S. Department of Energy’s 2023 Solid-State Lighting R&D Opportunities report notes that LED packages can exceed 200 lumens per watt in laboratory conditions. Real installations perform lower. Heat, diffuser loss, and crowded channels matter. For damp areas, select an extrusion with a sealed diffuser and verify the complete assembly’s protection rating. Do not judge protection from the aluminum body alone.
Tips: Match the mounting method to the substrate. Use clips for serviceable ceilings and strong adhesive only on clean, stable surfaces. Screws provide better long-term security, but they can damage finished panels. Test a one-metre sample before ordering the full length. Check diffuser glare, corner alignment, cable exits, and thermal behavior after several hours. The Zhaga Consortium’s interface guidance also supports checking mechanical compatibility early. I sometimes underestimate installation tolerances. That mistake is expensive to correct later.
Choosing the right LED extrusion profile starts with three practical questions: What is it made of, how should it look, and how much heat must it remove?
Aluminum is usually the safest choice for continuous LED lighting. It transfers heat away from the strip and supports stable performance. Plastic profiles may cost less, but they often provide weaker thermal control. For medium- and high-power installations, aluminum is more dependable. I prefer profiles with a solid thermal channel beneath the LED strip. Measure twice.
The finish affects both appearance and daily maintenance. Anodized aluminum offers a clean surface and resists ordinary corrosion. Powder-coated finishes provide more color options and can suit decorative interiors. In humid areas, inspect the coating carefully for scratches and exposed metal.
A bright silver finish may reflect more light, while darker finishes can make the profile visually disappear. Looks can mislead.
Always check the diffuser as well. Frosted covers reduce glare, but they also lower visible brightness.
Heat dissipation depends on more than profile material.
Check the LED strip’s wattage per meter, installation length, ambient temperature, and mounting surface. A profile fixed to a metal surface usually sheds heat better than one attached to painted wood.
A common mistake is selecting a narrow profile because it fits the furniture perfectly. I once saw this choice create excessive heat after several hours of operation. The lighting worked, but the strip aged faster.
Use a larger profile when airflow is limited. Test the profile after installation, especially near corners and enclosed cabinets.
How to Choose the Right LED Extrusion Profile?
Selecting an LED extrusion begins with the strip, not the aluminium channel. Check the strip’s width, wattage, voltage, colour temperature, and LED density. A high-density strip usually creates smoother illumination behind a shallow diffuser. Lower-density strips may show bright and dark spots. Measure the available recess carefully. A few millimetres can affect cooling, installation, and the final appearance.
The diffuser controls more than visual softness. A clear diffuser provides stronger output but may reveal individual LED points. A frosted or opal diffuser hides spotting and produces a gentler surface glow. In a bedroom, that comfort may matter more than maximum brightness. For work areas, higher transmission can be useful. Test a short sample before ordering long lengths. Light behaves differently on white paint, wood, stone, and textured walls.
Light distribution also depends on the profile’s position and orientation. A recessed profile can create a clean line, while a corner profile directs light across shelves or walls. Review the intended beam path, not only the product drawing. In real installations, a strip aimed at a glossy surface can create unwanted reflections. I once selected a diffuser that looked perfect in the workshop but appeared too dull on dark wood. That mistake was avoidable. Check thermal contact, leave room for wiring, and compare the measured output with the project’s needs. Perfect uniformity is not always necessary. Consistent, comfortable light usually matters more.
| Application | Recommended LED Strip | Typical Power Range | Recommended Profile | Diffuser Type | Light Distribution | Key Selection Criteria |
|---|---|---|---|---|---|---|
| Under-Cabinet Task Lighting | 24 V, high-density strip with a color rendering index of 90 or higher | 8–14 W/m | Low-profile surface-mounted or recessed profile | Frosted diffuser | Wide, even downward distribution | Choose a shallow profile for limited space and a high-density strip to reduce visible LED dots. |
| Linear Cove Lighting | 24 V strip with medium to high luminous output | 10–18 W/m | Angled or indirect cove profile | Frosted or opal diffuser | Indirect wall or ceiling wash | Position the profile toward the reflective surface to create a smooth glow and minimize glare. |
| Recessed Ceiling Lighting | 24 V high-density strip or flexible linear LED module | 12–20 W/m | Deep recessed profile with adequate internal space | Opal diffuser | Broad, uniform forward distribution | A deeper profile and greater LED-to-diffuser distance help blend individual light points. |
| Furniture and Shelving | 12 V or 24 V low-to-medium output strip | 4–10 W/m | Compact recessed or surface-mounted profile | Frosted diffuser | Focused shelf illumination | Verify the available mounting depth, cable routing space, and diffuser retention method. |
| Display Cabinets | 24 V high-CRI strip, preferably 90+ CRI for accurate product color | 8–16 W/m | Small corner, recessed, or adjustable profile | Clear or lightly frosted diffuser | Directional or asymmetric distribution | Use directional optics when the light must reach the front of displayed objects without excessive spill. |
| Stair and Step Lighting | 24 V low-output strip with suitable dimming control | 4–9 W/m | Recessed step-edge or angled profile | Frosted diffuser | Downward or forward distribution | Select a profile that protects the strip from impact and directs light onto the walking surface. |
| Bathroom and Damp Areas | Sealed or moisture-resistant 24 V strip | 6–14 W/m | Closed profile with protected strip cavity | Opal or frosted diffuser with sealed edges | Soft, uniform ambient distribution | Check the complete assembly's ingress protection rating; the profile alone does not guarantee water resistance. |
| Outdoor Architectural Accents | Low-voltage strip designed for outdoor use | 8–18 W/m | Weather-resistant aluminum profile with drainage provisions | UV-resistant frosted diffuser | Wall grazing or façade wash | Consider UV exposure, temperature changes, drainage, corrosion resistance, and sealed electrical connections. |
| Retail and Commercial Display | 24 V high-CRI strip with stable color consistency | 12–24 W/m | Deep surface-mounted or recessed profile | Clear, frosted, or opal diffuser depending on visual effect | Wide or asymmetric distribution | Higher output may require a larger aluminum profile for heat dissipation and longer operating life. |
| Continuous Dot-Free Light Line | High-density strip or COB-style linear LED strip | 8–16 W/m | Deep profile with sufficient diffuser setback | Opal diffuser | Uniform 120-degree forward distribution | Use a suitable LED pitch, diffuser opacity, and profile depth to prevent pixelation and hotspots. |
How to Choose the Right LED Extrusion Profile?
Verify Dimensions, Protection Ratings, and Installation Compatibility
Choosing an LED extrusion profile starts with accurate measurements, not a catalog image. Measure the LED strip width, height, cable exit, and available channel depth. Leave small clearance for easy insertion. Measure twice. A tight fit can crease the strip or trap heat. I also check the diffuser thickness before ordering. It must sit flush without pressing against the LEDs. This small detail is often missed.
Protection ratings require practical judgment. An IP rating describes resistance to dust and water under defined test conditions. It does not guarantee protection after careless cutting, drilling, or sealing. For a kitchen backsplash, verify the complete assembled profile, including end caps and cable entries. Outdoor installations need attention to rain direction, standing water, sunlight, and temperature changes. Test a sample outside when possible. My first selection is not always correct; a gasket may block drainage or complicate maintenance.
Installation compatibility matters as much as appearance. Confirm whether the profile supports surface, recessed, suspended, or corner mounting. Check screw clearance, mounting clips, bend radius, and future access. The power cable must pass cleanly without sharp edges. Match the profile’s thermal capacity to the strip’s wattage and length. A metal body can dissipate heat, but airflow and contact still matter. Follow technical data and applicable electrical requirements. I prefer a short trial assembly before full installation. It reveals errors that drawings hide.
Verify the profile’s internal width and depth against the LED strip and diffuser, then confirm that the protection rating matches the installation environment. IPX4 indicates protection against splashing water, IPX5 against water jets, IPX7 against temporary immersion, and IPX8 against continuous immersion under manufacturer-specified conditions. Also check whether the profile is surface-mounted, recessed, corner-mounted, or compatible with the planned clips and end caps.